HOW-TO
FAQ's
Frequently asked questions with useful information for successful wood projects.
There are three steps to a beautiful finish:
1. Prepare 2. Stain 3. Protect
1. Prepare consists of getting the wood surface ready for stain and finish application, and includes wood conditioning. Before you start a refinishing or finishing project, be sure that the wood’s surface is dry and free of old finishes in poor condition, paint, wax, grease, polish, dirt or other foreign matter. If you plan to stain, the surface must usually be completely free of old finishes.
Repair any cracks, gouges, nail holes and other defects. Minwax® makes products that can help in this process. Once the repairs are done, sand to obtain a smooth, uniform surface. Sand in the direction of the wood’s grain. Once sanding is done, remove all sanding dust.
If you plan to stain, apply a Pre-Stain Wood Conditioner. This will help you obtain an even stain color and reduce blotchiness, even on woods that are prone to blotching, such as pine or aspen. Minwax® makes two Pre-Stain Wood Conditioners - one for use prior to applying water-based stains, and the other for use prior to applying oil-based stains.
2. Staining is actually an optional step. Stains add rich color to the wood while allowing the natural beauty of the wood to show through. If you are already satisfied with the color of your wood, you can skip ahead to Step 3, Protect.
Before staining, test the selected stain on a hidden area of the wood or on a scrap piece from your project. This will help you ensure that the finished color is what you desire.
To apply a stain, follow the stain’s label directions. Most stains can be applied with a brush or rag, working the stain into the wood. Always give the stain a final stroke in the same direction as the wood’s grain. Allow the stain to penetrate according to the label’s directions, then remove the excess stain with a rag, again wiping in the direction of the grain. If you want a darker color, wait for the stain to dry and apply a second coat.
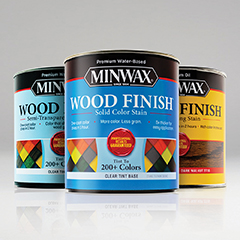
3. Protect with a clear finish. While wood stains bring out the beauty of the wood, clear finishes protect the wood and enhance its beauty. Whether you choose to stain your wood project or not, it is important that you protect the wood with a clear finish. A clear finish will protect wood against water, household chemicals, food stains and wear.
The Minwax® Company offers a variety of clear protective finishes. You can choose from oil-based, water-based, interior, exterior, and even convenient wipe-on finishes. Most are available in satin, semi-gloss and gloss sheens.
Selecting the sheen is a matter of personal preference. The gloss level will affect the appearance of your piece, but not its durability.
Before you apply the clear finish, stir it well. Do not shake the can, as this can cause bubbles in the finish. To apply the clear finish, follow the finish’s label directions. Apply the finish in thin coats, moving in the direction of the wood’s grain.
Many soft or porous woods, like pine, fir, spruce (soft) and maple, alder and aspen (porous) have a tendency to absorb stain unevenly. Treating the wood surface with Minwax® Pre-Stain Wood Conditioner helps prevent streaking and blotching to help ensure a beautiful, even stain.
Minwax® Pre-Stain Wood Conditioner is specifically designed for use before staining new or bare soft and porous wood surfaces. It penetrates the grain of the wood to promote uniform acceptance of stain. Prior to staining, apply a liberal coat of the Pre-Stain Wood Conditioner. Allow it to penetrate for 5-15 minutes, then wipe away the excess with a cloth. In fact, for highly absorbent woods, you can then apply a second coat, wait, and wipe away the excess again.
After you apply the Conditioner, apply the stain within two hours. Also, consider using Minwax® Gel Stain. Gel Stains are heavy-bodied, and so do not dive as deep into the wood as regular stains do. Because of this, they are often less affected by the condition of the wood, and can help you get a more even appearance on difficult woods.
Before you apply the stain to your piece, test it! Testing your stain is very important because the color of a stain, unlike paint, is influenced by the wood it is applied to. You need to see the stain color on your particular wood before you can be sure of exactly what color you will end up with.
Before you apply stain to your piece, try it out either on an inconspicuous area of the piece or else on some sample wood that you used when you built the piece. Stain it in the same way you plan to stain your piece, following all the same steps. In this way, you can adjust the color and get it right before you tackle the real thing.
Getting dark, rich color with stain
Often, the first coat of stain gives you exactly the color you are looking for. However, there are times when you want a darker, richer color of stain.
To achieve a darker stain color, use coarser grit of sandpaper (#150-#180) on the last sanding you do prior to staining. This will help the wood absorb more color.
You can also leave the wet stain on the wood for longer before you wipe away the excess - sometimes as long as 15 minutes. This may help you achieve a deeper color. Note: check the label directions for the particular stain you're using to see the maximum time you can wait before wiping off the excess stain. DO NOT let the stain dry for longer than the label recommends.
In addition, you can try a second coat of stain to see if it deepens the color.
Sometimes, the wet stain is exactly the color that you're looking for, but when the stain dries, it goes dull. Often, applying the clear protective finish will make the stain color-rich again. Try staining a sample (same material as your piece) and after it dries, apply the clear finish you plan on using. It will usually give the stain the depth, richness and warmth that you are after. Oil-based topcoats, such as Minwax® Fast-Drying Polyurethane, will impart some additional warmth and depth, while water-based topcoats, such as Polycrylic™ Protective Finish, usually dry crystal clear. Test both and see which look you prefer.
Did you wipe away the excess after you applied your coat of stain? If you didn't, the stain may still be tacky. You should not apply your clear topcoat until the stain is no longer tacky and has been allowed to dry at least as long as the label recommends.
To get rid of the excess stain now, take a cloth dampened with mineral spirits and use that to scrub down the piece. This should remove the excess stain. Alternatively, apply another coat of stain, wait a couple of minutes for it to soften up the old, tacky, excess stain, then take a cloth and rub away the excess.
If you did wipe away the excess stain, then the stain may be having a problem drying or sinking into the wood. If you applied the stain to bare wood see the Frequently Asked Question "Why is it taking so long for the stain to dry?" for information. If you did not apply the stain to bare wood, then that is the problem. Stain is designed to be applied to bare wood so the wood can absorb the stain. If there's already a clear finish on the wood, the stain can't be absorbed. Remove the clear finish now, then re-stain.
There are several factors that can cause either stain or clear finish to take a longer time to dry than the time listed on the label:
- Poor ventilation
- Cold temperature
- Thick coats
- Humid weather
Poor ventilation - working in a poorly ventilated area can cause the finish to take longer to dry. To help the finish dry faster, try opening doors and windows. If your room has multiple windows, try putting one fan, facing out, in one window; and another fan, facing in, in a second window. This will help create an airflow through the room that will allow the finish to dry faster.
Cold temperature - temperatures below the mid-70° F range can cause longer dry times. Most people don't consciously notice longer dry times until the temperature gets below about 50° F. Above that temperature, the dry times may be longer, but it's usually not perceptible.
Lacquers can have special problems during cold weather. They can sometimes blush, or get whitish and cloudy when applied in cold weather, especially weather that is cold and damp. The best solution is to apply the lacquer on a warmer day. If the lacquer has already blushed, try bringing the piece into a warmer space. If that doesn't work, it might help to apply another coat of lacquer.
Thick coats - most clear protective finishes dry better when they are applied in thin coats, rather than thick coats. The final appearance of the finish is often better, too. Try to apply several thin coats, rather than a couple of thicker coats. If your coat goes down too thickly, just wait. With time and patience, it will dry.
Humid weather – the #1 problem caused by humidity is longer drying times for stains and clear protective finishes. If it's humid out, you can usually expect the stain or clear finish to take longer to dry than it says on the label. However, if you're patient, it will dry. If it is extremely humid, it's best to wait for a drier day to finish your project. Working in an area with good ventilation can help speed up the dry time.
Humidity can also sometimes cause some clear finishes to blush, or take on a whitish, cloudy haze after they are applied to the wood. This is caused by moisture getting trapped under the finish. Often, once the humid weather stops, the blush will go away as the moisture evaporates.
Sometimes the blush needs some encouragement to leave. You can try using a hairdryer to remove small spots of blush from a finish. Turn the hairdryer on, and keep its warm air moving over small areas of the blush. This takes several minutes, but can often really help.
With lacquers, you can sometimes get rid of the blush by applying another coat of lacquer.
Lastly, if all else fails, you can remove the finish and try again on a less humid day.
Often, older pieces of furniture, especially tables, have white rings in their finish. These rings are caused when glasses and cups have been put on the surface, and the moisture from these objects has seeped into the finish and damaged it.
To fix the ring, slightly dampen a soft cloth with denatured alcohol and wipe the damaged area very, very gently, then let it dry. If the cloud is still there, repeat after two minutes. Don't use too much denatured alcohol, and don't rub hard, or you can damage the finish.
If this doesn't work, you can often repair the white rings by buffing the damaged area of the surface with a mild abrasive. For example, use a soft, dampened cloth and baking soda mixed with non-gel toothpaste to buff. Buff the white ring using a gentle, circular motion.
This might be enough, but sometimes this buffing causes this area of finish to have a different sheen than the rest of the tabletop. When this happens, you can use paste wax across the entire surface of the tabletop to even out the sheen, or sand the entire surface lightly and apply a new coat of a clear protective finish. If the ring has not disappeared after about five minutes of buffing, then the stain is probably too deep to be fixed through such mild methods. The table will probably have to be refinished.
Sometimes, bubbles appear in a polyurethane finish once it has dried. There are several factors that can cause bubbles:
- Moisture in the wood
- Using a poor quality brush
- Using a roller, instead of a brush
- Shaking the can of polyurethane
- Over brushing the polyurethane on the wood
Moisture in the wood - Be sure that the wood you are using is dry and in good shape before you apply any finish, including polyurethane. Be especially cautious of wood that has been stored outdoors or in a moist environment, and give it plenty of time to dry out before you try to finish it. Otherwise, the finish may trap the moisture in the wood, causing problems as the moisture tries to escape, including bubbles.
Using a poor quality brush - To prevent bubbles, use a good quality brush. For an oil-based polyurethane, such as Minwax® Fast-Drying Polyurethane, use a natural bristle brush. For a water-based polyurethane like Polycrylic™ Protective Finish, use a synthetic brush.
Use a roller instead of a brush - do not use a roller to apply polyurethane. It can introduce bubbles into the finish. Instead, apply polyurethane with a good quality brush.
Shaking the can of polyurethane - Do not shake the polyurethane - instead, stir it so that you rotate the polyurethane from the bottom to the top of the can. Shaking will create bubbles in the polyurethane that will show up in your finish. If you did accidentally shake the can, let it rest for a while before you use it so that you give the bubbles time to break.
Over brushing the polyurethane on the wood - As you apply the polyurethane to the wood, use the brush to lay the polyurethane down, and do not brush back and forth across the surface. Once the polyurethane is down on the wood, take the dry brush and "tip-off" the finish by holding the brush at a 45-degree angle to the wood, and running it lightly in the direction of the grain across the surface of the polyurethane - think of feathering the polyurethane in. This breaks any bubbles that may have appeared, and also helps to blend one section of the polyurethane with the surrounding sections.
Since PolyShades® has the stain color suspended in the clear topcoat, if you aren't careful, any drips, runs or unevenness can show up in the final result. To get a great result with PolyShades®, apply two or three very thin coats, building up the film and color slowly, rather than trying to apply one thick coat. Allow the Polyshades® to dry for 6 hours between coats.
Be sure to stir the can thoroughly before you use it, and again occasionally during use. Apply the product with a good quality, natural bristle brush, and move the brush in the direction of the wood's grain. Be sure to maintain a wet edge — where one pass with the brush touches a prior pass — so that the areas blend together once they are dry.
UV in sunlight, moisture, humidity, rain, and temperature shifts - all of these factors can really do a number on your wood. If your wood is going to be outdoors, it is best to protect it with a finish designed for use outdoors, like Helmsman® Spar Urethane, Water Based Helmsman® Spar Urethane, or Helmsman® Teak Oil. These products offer outdoor wood special protection against UV light, temperature changes and moisture. They work great on most outdoor wood, but on large surfaces that would be hard to maintain, like a deck, it would be better to use a product like Thompson's® WaterSeal® Water Proofer Plus Clear Wood Protector which does not need to be stripped or sanded in order to be refinished.
Does your furniture, floor, trim or other woodwork show signs of wear such as scratches, nicks or gouges? You may not have to refinish it. Instead, try repairing it!
Many minor scratches in wood that go through the color can be repaired through the use of a Minwax® Stain Marker. For deeper scratches and for nicks in the wood, a Blend-Fil® Pencil will do the trick. For filling nail holes and some small gouges, Minwax® Wood Putty will work well. Each one comes in a variety of colors designed to match Minwax® stains.
For minor scratches or nicks in your clear finish, try Wipe-On Poly. It even works to touch up small scratches on floors. Just be careful when you apply it, as the gloss level may not be identical to the finish you already have on your floor. Test it in a small area first.
If you did not find an answer to your question here, check out our Q&A Live Chat feature on the Contact Us page.